Saving Lettuce Seed

Hello reader,

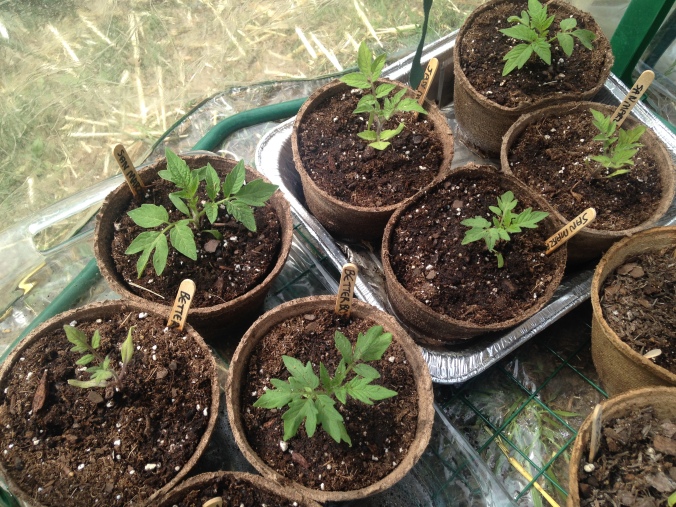
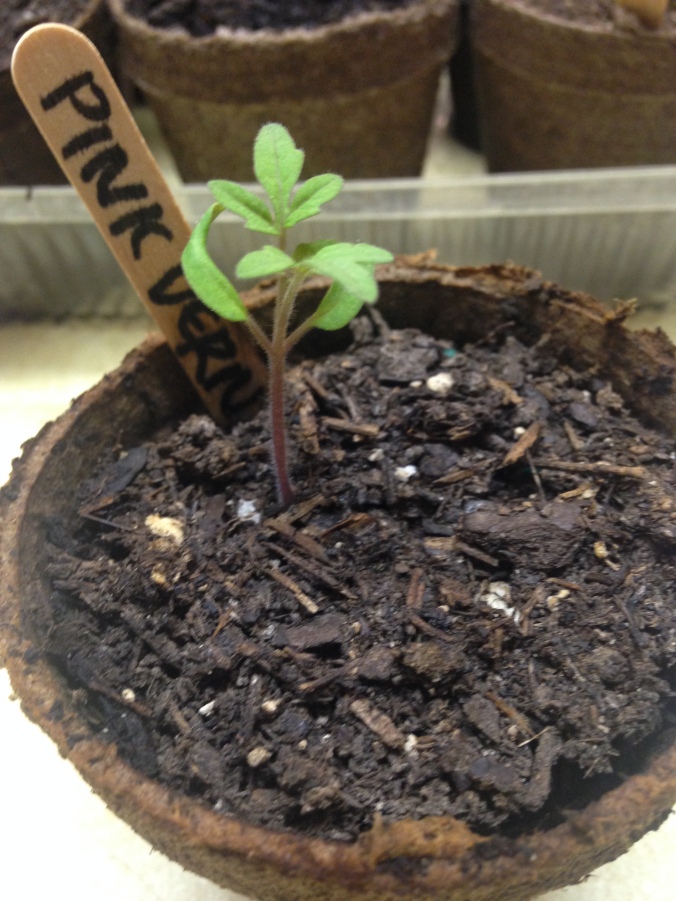
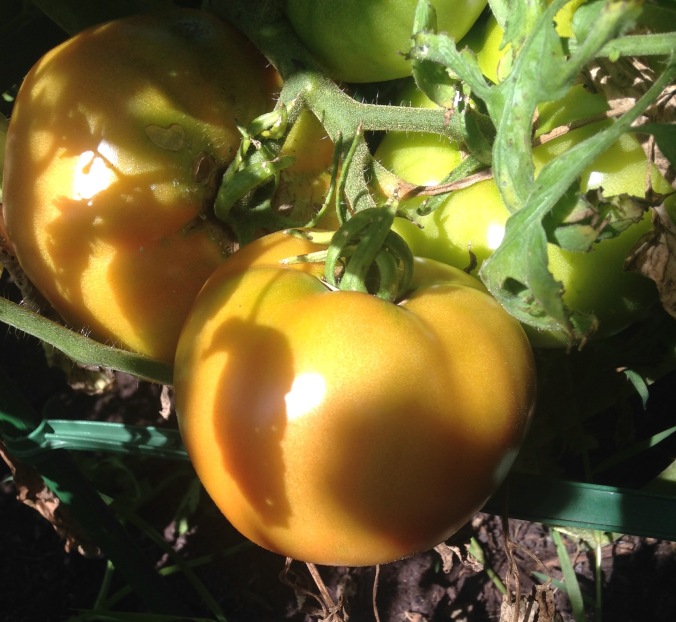
Yesterday, I said in my post that only the San Marzano and Pink Vernissage were beginning to ripen. Well, the Jet Star and Better Boy tomatoes must have overheard the news because when I went out to the garden after work, voilà! Not one, but TWO Jet Star tomatoes were orange! In a day or two, they’ll be ready to pick!

image.jpeg

MMMMH sandwiches!

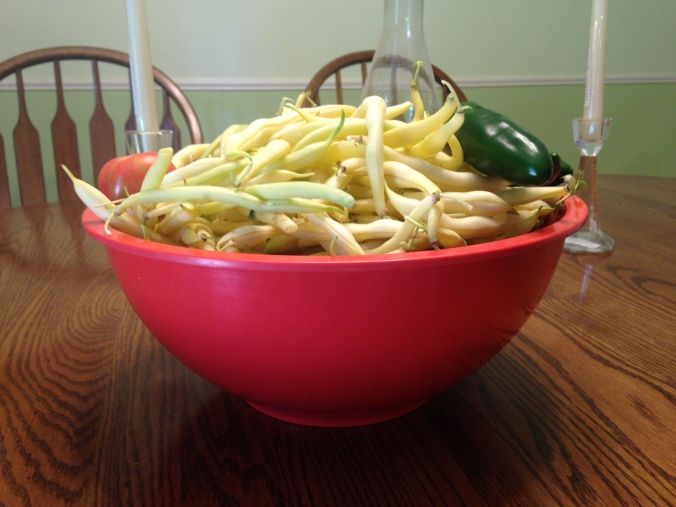
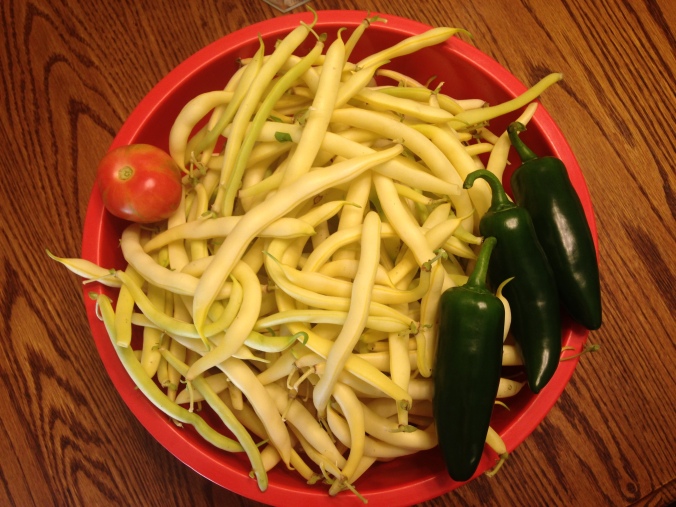
I also took a new photo of all the veggies we have sitting around waiting to be eaten. There were more veggies to harvest today, and the bounty is beginning to stagger in at a slightly more steady rate.

image.jpeg

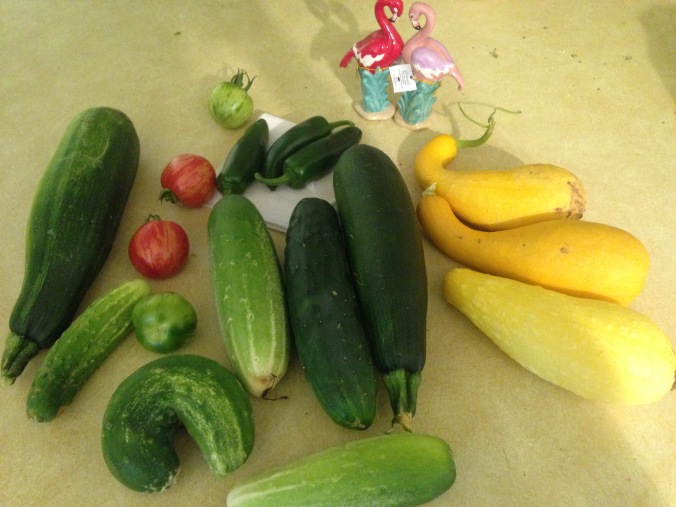
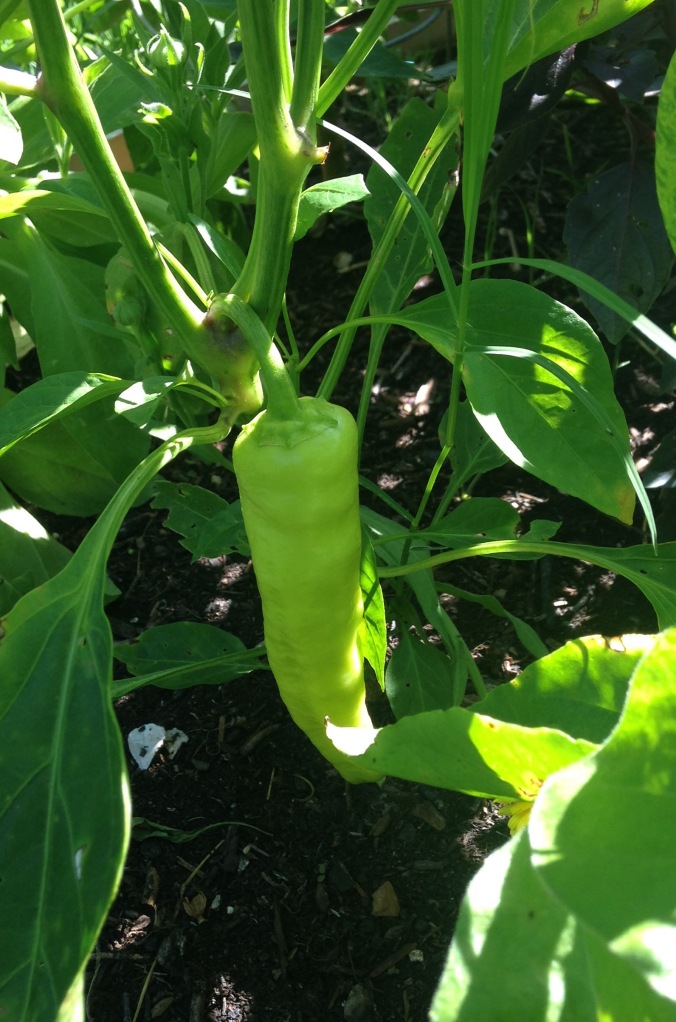
We have here (aside from the Flamimgo salt and pepper shakers I threw in for kicks) Fordhook Zucchini, possibly a Black Beauty Zucchini, yellow squash (I THINK it’s the Early Prolific), Green Vernisagge, Pink Vernisagge, the jalapeños from this past weekend, and cucumbers. I have no idea which variety of cucumber, because they have really intertwined together!

We have more on the way by the looks of it.

Check it out:

imageimageimageimage

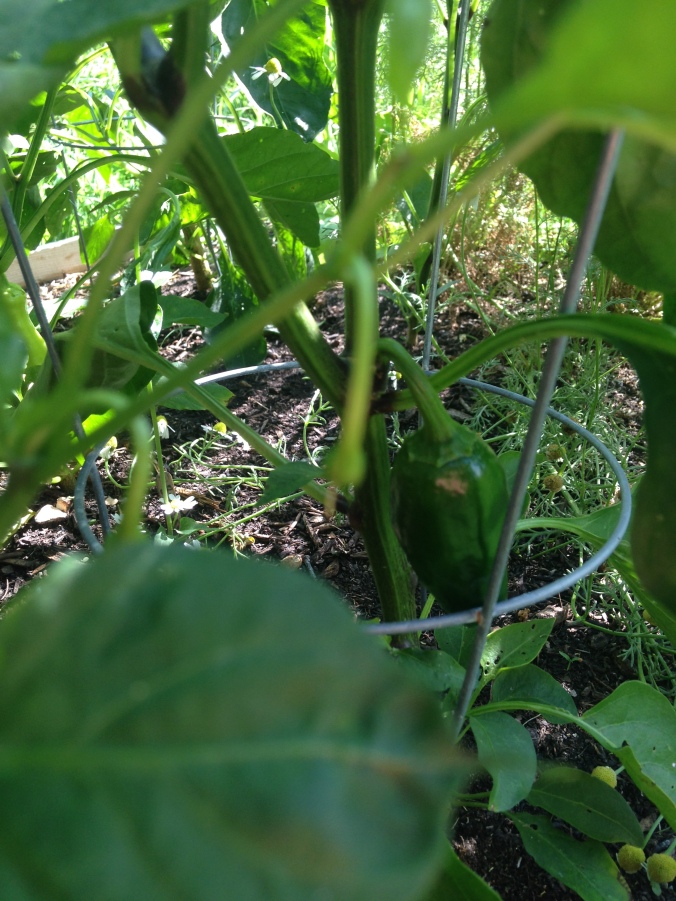
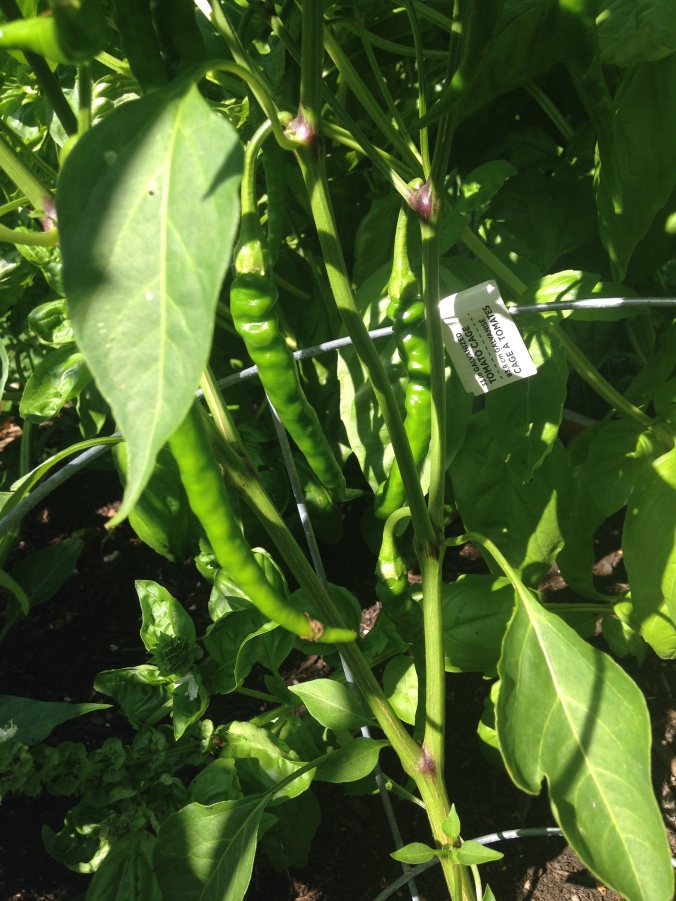
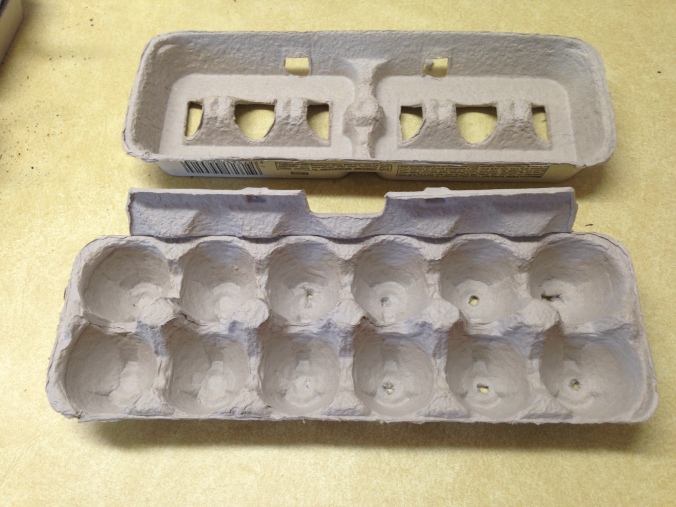
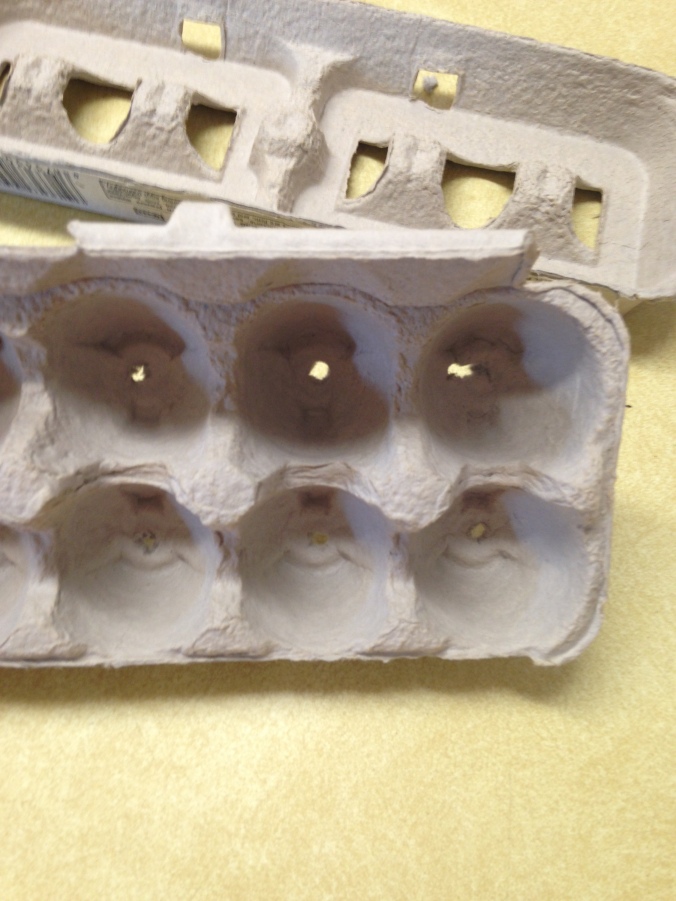
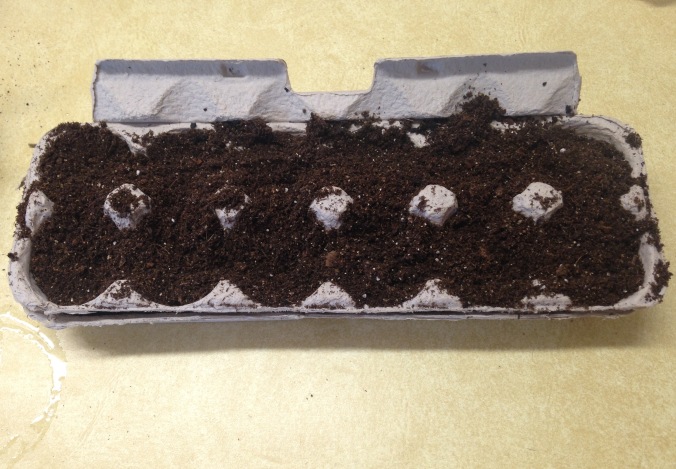
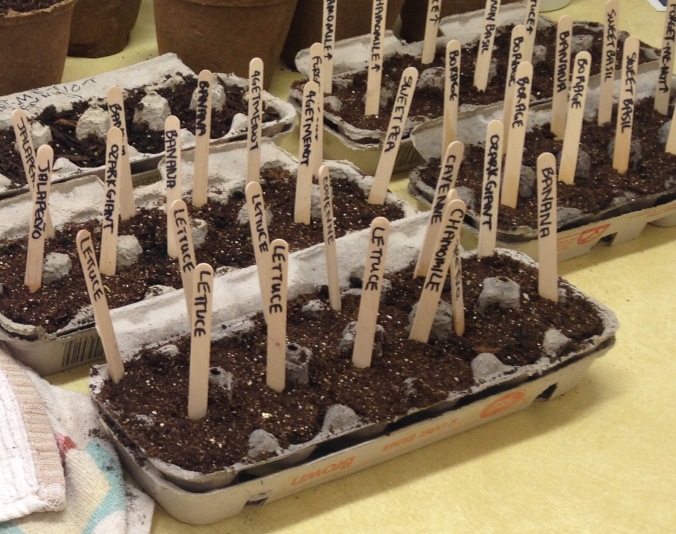
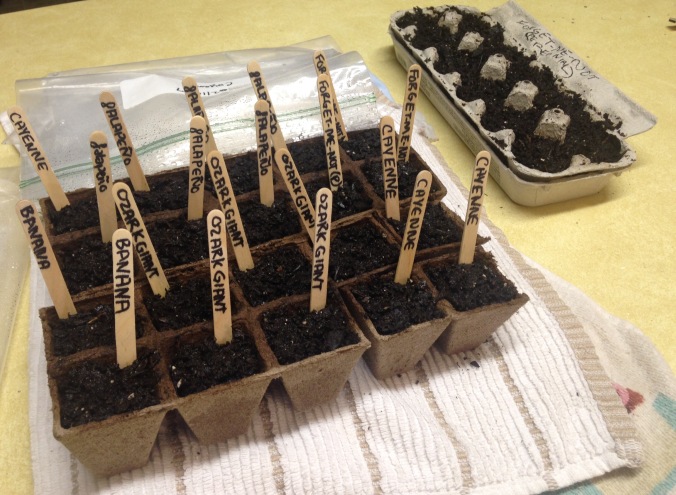
Pictured above are San Marzano Tomatoes, Banana Pepper, Jalapeño Mild Pepper, and Cayenne Pepper. (San Marzano was Ferry-Morse purchased at store in town and the peppers are heirlooms from Baker Creek). All of these were grown from seed and you can see previous posts that track the journey of growing them! If you look back at April posts, you’ll notice they’ve grown a lot since then. We learned as we were transplanting them that the egg cartons had caused them to become root bound, but once they were removed from those and planted in the garden they REALLY took off!

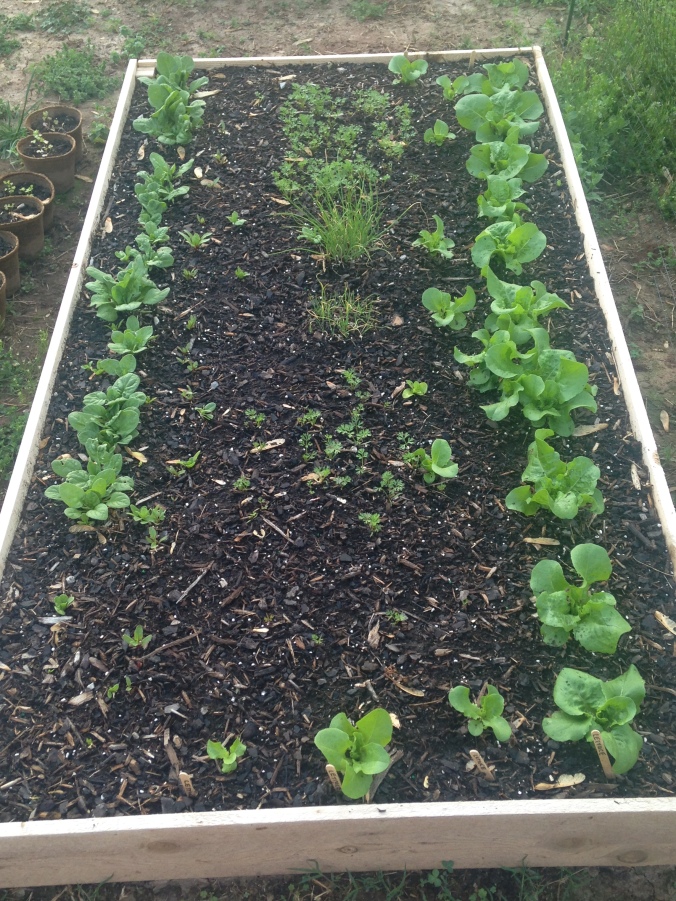
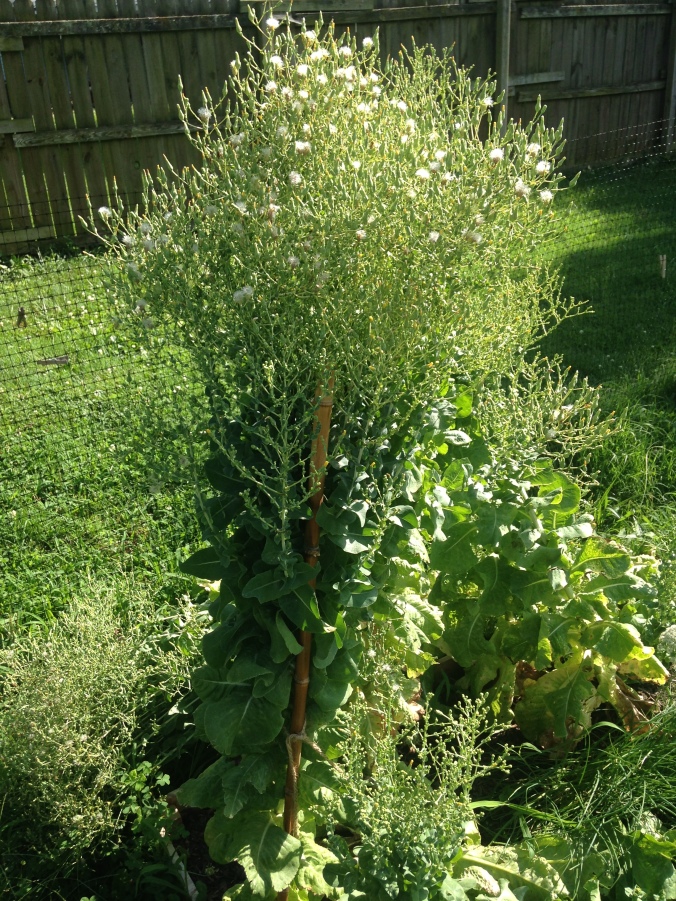
On a different note, and arguably the main point of this post, we have lettuce seeds in abundance. The Buttercrunch heirloom variety that we ordered from Baker Creek in Mansfield, MO has officially gone to seed, and so we are scurrying around trying to get everything together to save it for next spring (or maybe even this fall).

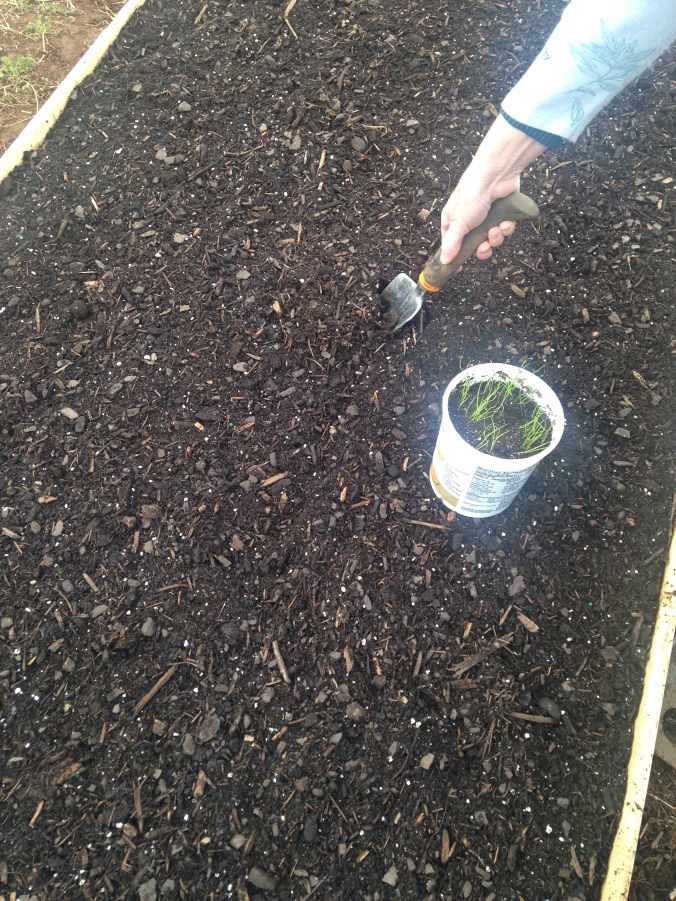
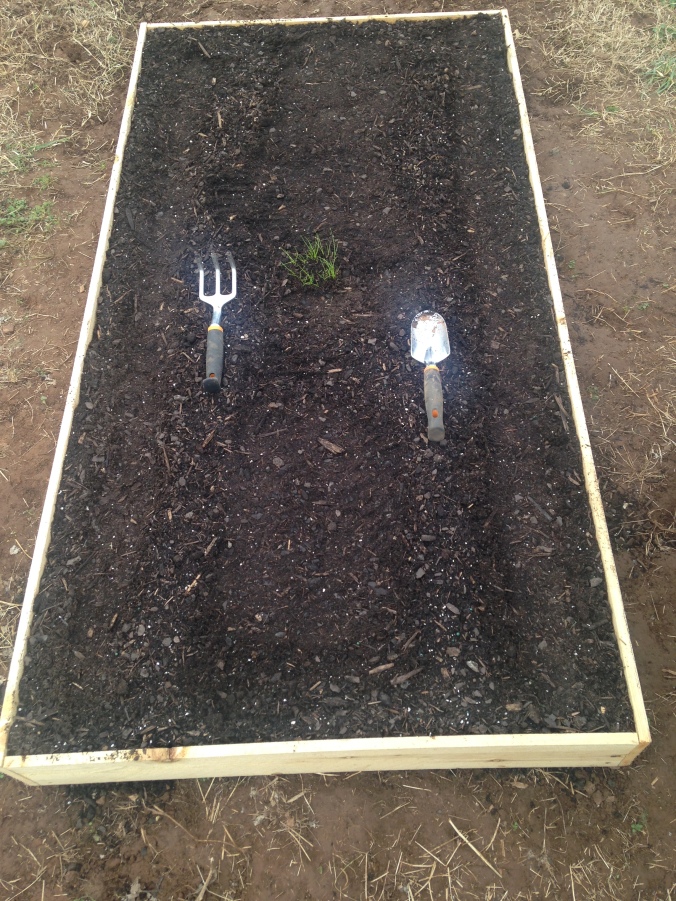
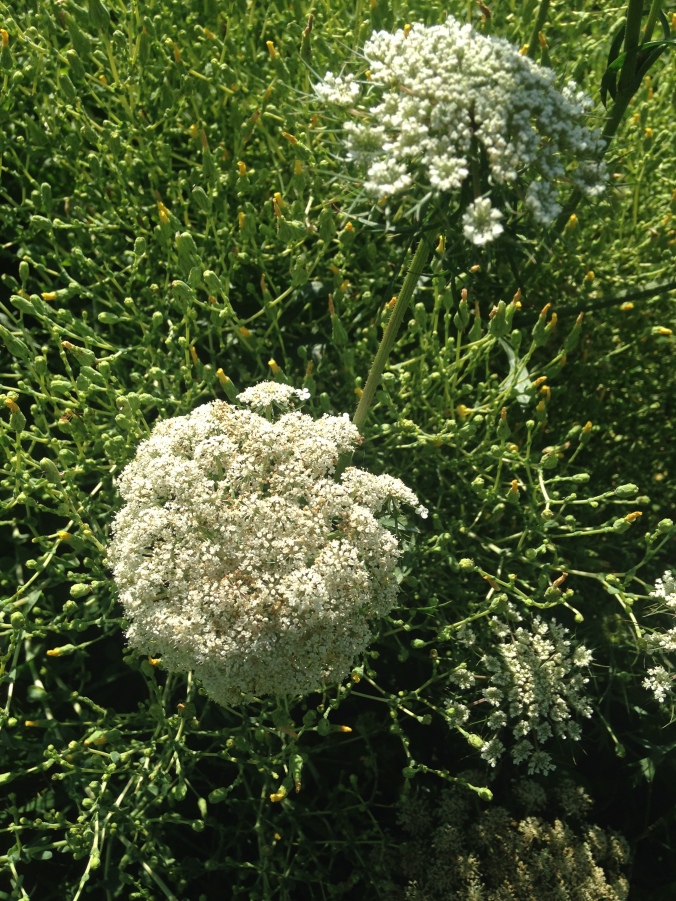
The lettuce is extremely tall, and we ended up staking it to keep it standing up! The carrot going to seed (third picture down) already has fallen over, unfortunately, but that hasn’t slowed it down!

imageimageimageimageimage

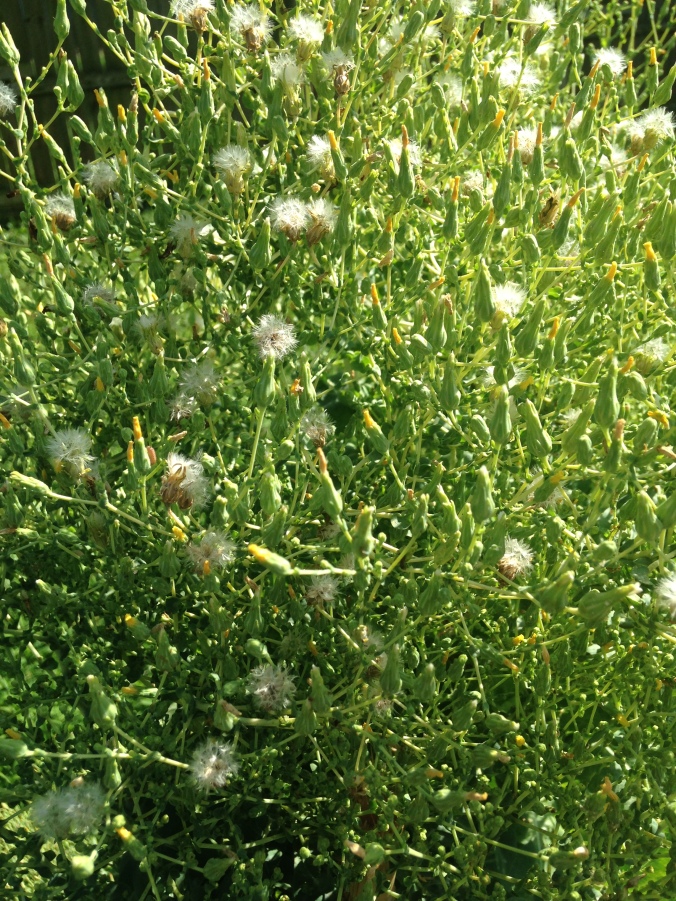
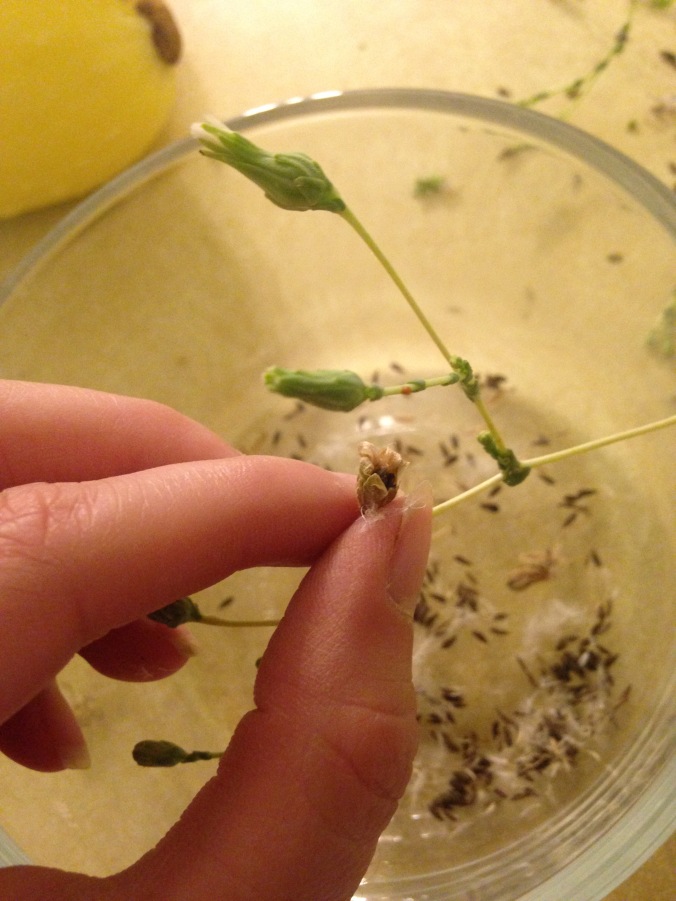
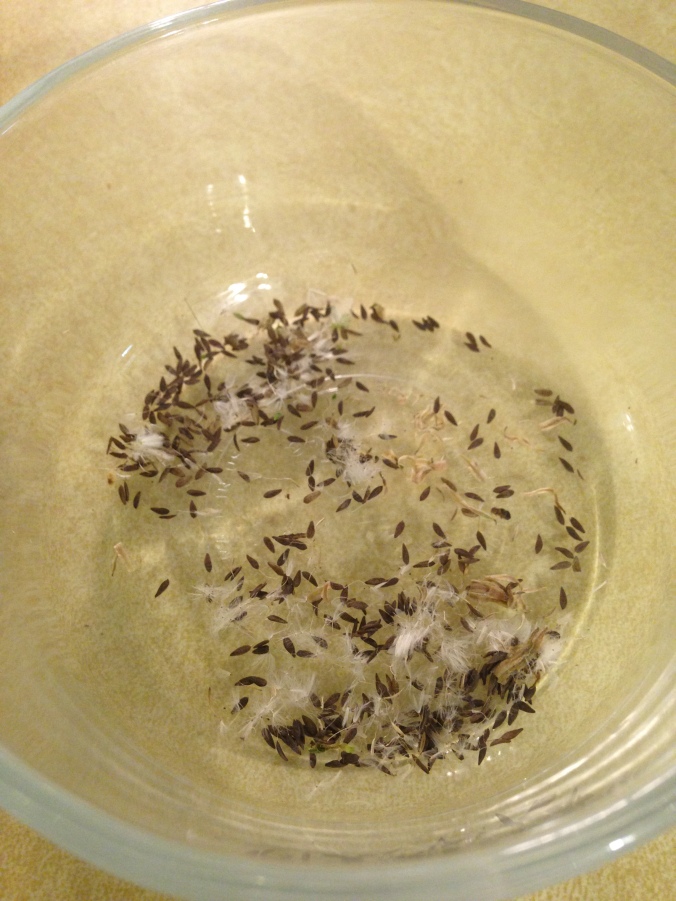
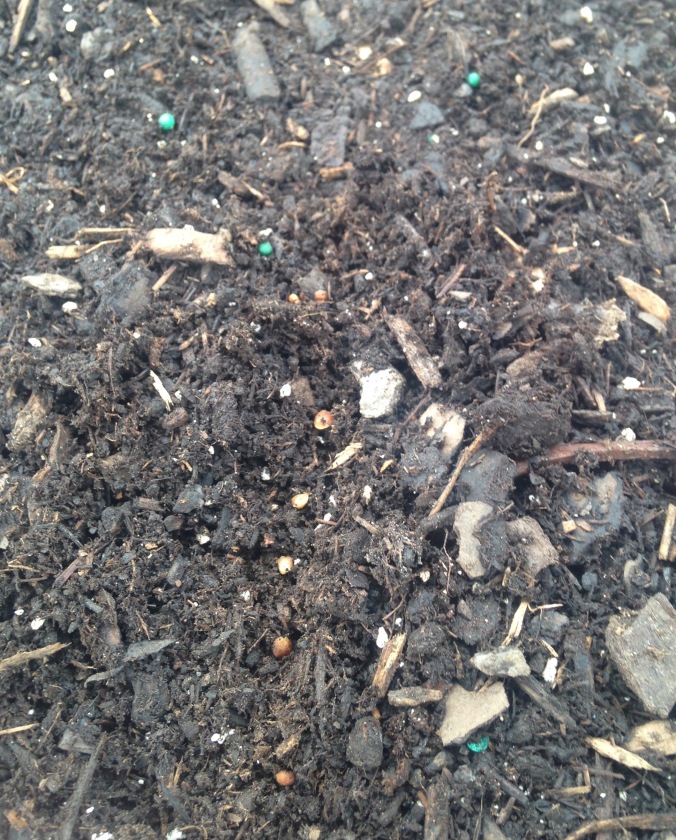
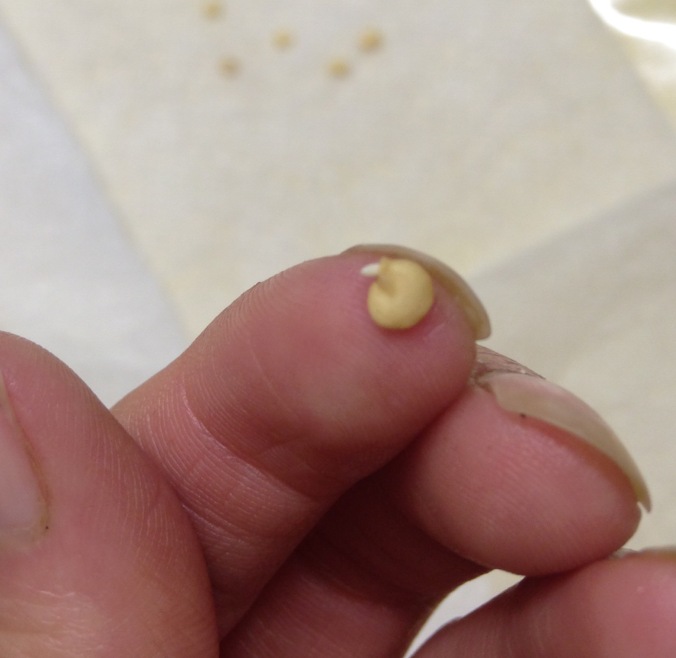
So how do you save lettuce seed you might ask? We’re still learning as we go, but lettuce should be fairly easy as far as saving seeds goes. We are opening up the pods that look like dandelions, and the seeds that are dark in color are the ones we are saving. If the pod has dried out, that’s a sure sign that the seeds will be a dark brown!

We are currently looking into how to store the seeds, and will post an update later. One we have our seeds saved, we hope to participate in a seed exchange nearby and trade our seeds for some others (while keeping some of ours to also plant).

Until then, keep up the good work of crafting your garden!

Saturday Morning

Hello reader,

Yesterday, June 8th, we took advantage of the cooler morning temps. It’s officially summer, and with the season comes hot days and less rain. So in the morning, we try to harness the time and stroll through the garden. We had our third harvest for Cherokee Wax green beans and it was the biggest harvest yet, I dare to say! We also were able to pick three more jalapeño peppers (the first one was previously picked), and our first ripe tomato of the season was ready with more on the way! We split the little tomato and we can’t wait for more! It was the heirloom Pink Vernissage and was bigger than the normal cherry tomato size, but will be great for salads or tacos. We also see a San Marzano beginning to ripen. No signs of ripening with our Jet Star or Better Boy as of yet, but they have grown to be almost as tall as us, so I’d venture to say they are 5 ft or taller (although we haven’t measured them). They have tomatoes filling out their foliage as are the rest of the varieties.
We’ve also noticed banana peppers, more jalapeños, bell peppers, cayenne peppers, more cucumbers (we recently picked a couple small ones), and more squash. However, the squash is usually covered with bees hovering around the blossoms and they become coated in yellow pollen. Since we want to leave them to their bees-ness, we harvest squash at night. Last night we picked a couple more and there is more still growing.
We also recently discovered a bunny nest next to our squash – so cute! Luckily, the lettuce and carrots have already been harvested, but I’m sure they’ll find other things to nibble on. Perhaps we should be creating a “Peter Rabbit” garden theme with statues and a scarecrow that consists of wooden stakes and a small blue jacket. A fairy tale come to life!

I couldn’t help conducting a photoshoot of our most recently harvested veggies before blanching and freezing the green beans. So, for all of you who can’t get enough of garden photos (like me), here you go:

imageimageimage


Spring Blessings and Summer Wishings

Hello reader,

We have been staying super busy this gardening season, and am sorry to say I’ve fallen behind on my posts! I’m going to attempt to condense the past few months into some garden updates for you all.

May 3rd, I boiled and froze spinach. It was our “big harvest” although we only planted a little bit of spinach. It was cool and raining, but the spinach was begging to be harvested! And it was so worth trekking  in the mud in my flip flops to harvest that spinach. The taste was a bit richer than store bought. So delicious! We’d already been harvesting off and on, giving some away, and cooked a delicious dish of spinach Alfredo as well as a hot spinach artichoke dip. The possibilities are endless! Now we are looking forwarded to using our own frozen spinach in future recipes.

May 23rd I picked our first carrot – and it was BEAUTIFUL! By May 31st, we picked almost all of the remaining carrots. We used the carrot tops in a homemade soup (see the recipe below), a pesto, we cooked carrots, and we froze carrots. What a blessing they were! It was my first success growing carrots, and I can’t wait to try saving the seeds to grow them again next year.

May 29th we harvested our first beet after a brief mini vaca. By June 4th we were roasting beets, and they were absolutely delicious and tasted like a gift from the earth. We were pleasantly surprised at our success with all of these veggies! Now, we have jalapeños that are ready to harvest, have started harvesting yellow squash and zucchini, and our first tomatoes are ripening. We are hoping that this is only the beginning and that the rest of summer is as kind as spring has been! What a blessing a garden turned out to be this year.


I think that sums up all of the gardening news. Here are some photos to enjoy!


Garden Soup Recipe

Author: Tara

Ingredients:

2 Tbls oil
1 onion
1-2 tsp garlic (1-2 cloves)
2-3 parsnips, chopped
1-2 cups carrots, diced
2-3 celery, diced
2 cups greens of choice, chopped
1-2 cans pinto beans
Large can diced tomatoes (or fresh tomatoes to taste)
4 small zucchini or 2 large, diced
1 package sliced mushrooms
7 cups chicken broth
1-2 handfuls fresh parsley, chopped
1-2 large potatoes, diced
Poultry seasoning – to taste
Paprika – to taste
Thyme – to taste
Marjoram – to taste
Salt and pepper – to taste

Directions:

Heat oil in large stockpot. Add onion, garlic, carrots, and celery and cook until they are more tender and fragrant. Add parsnips, greens, and mushrooms and cook a couple minutes more. Next, add the rest of the ingredients, adding more spices as needed. Bring to a boil. Reduce heat, then summer until the vegetables are fork tender. Taste and adjust as needed. Enjoy!


Have a wonderful garden season as you continue to craft your garden!


Please note – If you are uncertain about eating the tops of carrots or beets, they would probably be great for composting or tossing outside for wildlife. We chose to cook with them after trying to research further about eating these, but it’s not for everyone.

Another update – Tomatoes and Peppers!

Hello!

Today we transplanted tomato seedlings to bigger pots – I picked one of our tomatoes up and the roots were growing out of the bottom! And they won’t be transplanted to their permanent home for another week or two. That’s a bit concerning to me seeing as how they almost doubled in size in the last couple weeks. One tomato got droopy after the move up, but with some temporary shade and extra water (everything got a lot of water after the transplanting), it perked back up and returned to the sunshine! Here’s some photos of our tomatoes and peppers. The first are the plants that are our strongest and growing the quickest. The second half are the plants that haven’t been growing so quickly, and some tomatoes haven’t been growing very well for a while (sad day!!). In fact, I have zero Roma tomatoes that grew really well. Next year I’ll opt out of trying to grow that variety. As for why some plants of the same variety grew better/worse than the others, there’s not a lot of explanation for it. The only cause I can think of is that the seedlings all have slightly different genetics like people do, so some survived better? That is, after all, how plants (open pollinated) grow and evolve as the climate changes throughout history.

Okay, here are the plants!

A cayenne and banana pepper, they started to grow quicker with the good weather and strong sunlight.

image.jpeg

image.jpeg

Most of the tomatoes! They are looking like they like their new upgrade.


Now for the ones that have some catching up to do:


I have high hopes for the seedlings that are smaller (well, I’m not certain of the Roma’s). Stay tuned for when we transplant to the gardens! So far we should have each pepper variety to transplant and all but the Roma for tomatoes, unless the Romas decide to really take off and have a sudden growth spurt, turning a nice green in the process. Right now their a bit on the pale side.

I hope you all are having good luck with your seedlings or having fun picking out plants at the stores as you craft your garden!

First Harvest!

Hello!

This morning I wandered outside to our cool weather garden, which is basically just part of my daily routine. And what a lovely routine it is! To my discovery, the lettuce is continuing to grow quickly. In fact, the outer leaves are just about sandwich ready! The real star of the show today, though, was the Matador spinach. It looked ready to start harvesting! I restrained myself from harvesting until dinner time. When I returned home from work and went back out to the garden, it almost looked like everything grew even more since the morning! It was a small amount that was harvested (we only planted one small row and it’s JUST now starting to be ready). I tried to only harvest the outer leaves, and feeling the crispness as each leaf was harvested gave such a sense of accomplishment! Gardening can do that. It can give such a sense of achievement and it also gets you in touch with nature as you learn how to work WITH nature.

Anyways, back to the spinach. Just check out those crisp green leaves! And it was so tasty in our alfredo dish this evening.

image

Matador spinach, Ferrymorse. Approximately took 7-8 weeks from seed to harvest. 

image

Most up to date photo of the cool weather veggie garden. Look at that lettuce go!! The chives that went through cold stress are still trying to make a come back, though.

Go Tomato Go!

A few tomatoes are really growing quickly! They’re my shining stars among the tomato seedlings – at least for now until the others start taking off! I thought I’d share the two varieties that have been doing so well in the beginning stages.

San Marzano!

image.jpeg

Ferrymorse – seedling is approximately a couple weeks old.

Pink Vernissage!

image

Baker Creek – seedling is approximately a couple weeks old.


Also, check out these fun links for additional info. about tomatoes for crafting your garden:

http://www.tomatodirt.com/san-marzano-tomatoes.html

http://www.hgtv.com/outdoors/flowers-and-plants/vegetables/the-best-tomatoes-for-sauces-pictures

Sunny Side Up! An Egg Carton Tutorial For Starting Seedlings

Ahh – it’s finally warm enough to sit outside as I write this post. Sunlight is filling the yard with the promise of Spring. Yesterday was chilly and rainy – reminding me of my vacation days in Portland. Today, well today is a bright and cheery day. I’ll bring y’all up to speed on some things, then I’ll do a little tutorial about using egg cartons for starting seedlings.

Lettuce and carrots sown Feb 20th.

image

image

A comparison: chives on the left were transplanted in February, going through 22 degree temps. Chives on the right were given an extra few weeks indoors before transplanting.

image

Close up measurement of the chives that were recently transplanted, originally sown indoors in January:

image

Our best parsley so far:

image


Now for those egg cartons you likely are throwing out often! There’s a great use for the non-styrofoam cartons during the beginning of garden season. You can try out using them for starting seedlings! Here’s how I did mine:

Step 1:

image

Cut apart the two halves. One will be the tray that catches water, the other to fill with dirt.

Step 2:

image

Poke holes in each section, carefully. This will allow adequate drainage.

Step 3:

image

Fill with your seedling mix!

Step 4:

Carefully pick up pre-germinated seeds to plant. If you didn’t germinate the seeds yet, then just plant according to the directions on the seed packet. Shown in these pictures are chamomile seeds. TINY seeds!!

Step 5:

image

Make note of what seed is planted where and watch them grow!


I should note that some plants may start to grow roots through the cartons before transplanting. Mine have started to do this, so I’ll be putting the individual sections into bigger containers for the fast growing plants. Also be aware that these become quite flimsy when you are watering plants, so it’s probably best to keep them on a tray for good support. You don’t want the carton to rip in half as you carry it and deal with seedlings spilling out!

Have fun coming up with your own ways of starting seedlings – there are lots of ideas out there! Craft your garden!

One Month Later

Hello everyone!

It’s been a while since my last post, so it seems fitting to give y’all an update on our seedlings.

Last week, temperatures plummeted to as low as about 22 degrees Fahrenheit and the sun spent a lot of its time hiding behind the clouds. Not your ideal growing conditions! We’ve also recently had sleet, hail, thunderstorms, snow, and after all of this we had 80 degree weather today. It has seriously been ALL over the place!! And yet, we still have pansies in full bloom, roses growing leaves, a hydrangea growing some greenery, a couple peonies, and we just saw our first sign of green on an azalea. On top of all that, our first raised bed for the cool weather plants has been thriving. In fact, I had to thin out the lettuce so that it can start to focus on growing into heads of lettuce.

image

I know it’s almost impossible to see some of the seedlings, but we have a ton of Cosmic Purple Carrots (Baker Creek), Matador Spinach (Ferrymorse), Buttercrunch Lettuce (Baker Creek), and of course chives (Ferrymorse). This photo was before I thinned out the lettuce (there was a lot extra!). Can you tell where in the lettuce one of our furbabies walked through right after I planted the seeds? 🙂

We also have the first sprouts of Tall Top Early Wonder Beets (Ferrymorse).

About a month ago or so, there were only chives that had been transplanted. A lot happens in just a month in the gardening world! Unless you’re parsley being grown in soil from a seed. Then you likely aren’t doing much at all. Good thing we used the paper towel method for parsley this year!

Let’s check out the progress during this past month:

Parsley photographed February 19th and later on March 19th. Growth seemed to improve when it was inside the portable greenhouse.

Peppers photographed February 21st and March 18th. The first picture was right after planting the germinated seeds. Following advice from The Vegetable Gardener’s Bible, the peppers spent time outside in the cooler weather for a few weeks after germinating. 

There are also tomatoes 2 weeks old that are growing true leaves, and many other seedlings that are really starting to take off. The one thing we have really struggled with, is making sure the containers don’t dry out and stress the seedlings. We had this happen and lost a few, which was super sad! But, you know what is a great solution? Using those aluminum lasagna pans you normally use in the freezer. They come with plastic lids and aluminum pans. We had some on hand for freezer meals, so we put those to use. You can water from the bottom of the tray and it keeps the seedlings from drying out in the hot sun.

One last side note, the Buttercrunch Lettuce is one of my candidates this season for seed saving. Baker Creek shares online that there are no patents on their seeds, they are heirlooms, and they actually encourage people to share and save seeds (which is REALLY awesome). The Buttercrunch, being from Baker Creek and an easy veggie to start saving seeds from, is likely going to be in a later post about seed saving. And with all of this intense and variable weather, those seeds are going to produce some hardy plants in the next season! That’s why I’m so excited to start saving seeds for heirlooms using Baker Creek seeds. It’ll actually feel like our plants become better fitted for our growing seasons. The strongest plants survive, and those seeds go on to grow stronger plants. How awesome is that? Looks like my past school science knowledge is actually starting to have real world relevance.

I hope your seedlings are growing strong! And as always, have fun crafting your garden!

How We Built Raised Beds Around $12 A Piece

Hello reader,

This is finally the blog post I’ll be explaining how my husband and I built our raised beds for a not-so-whopping $12 a bed (rough estimate). When I’ve read up on tips for raised bed sizes, typically they are supposed to be fairly deep and not too big. We like to make our own rules, though, especially when we are trying to build a garden on a budget! We went to a couple stores to browse the lumber areas and brainstorm some ideas. My husband is pretty brilliant at improvising and is very intuitive when completing projects around the house. Building raised beds were no exception. We found cedar  wood (my gardening book, The Gardener’s Bible, mentioned in previous post specified that cedar deteriorates slower) used for privacy fencing. This wood measured around 6 feet long and would create a 6 inch bed. If you wanted to, you could stack these to create a 12 inch bed depth, but we are trying out the 6 inch depth to start with, especially so that we keep our costs down. If it works well, then we didn’t spend unnecessary money and use excess material. Next, we looked for a long piece of solid wood we could cut down for the corners. We also needed screws that are fit for outdoor use and wood glue. After all of these materials were gathered, we got to work on building 3×6 beds and 6×6 beds. Before actually building the 6×6, we made sure we could reach the middle as needed, although I should let you know that the 6×6 will have larger crops with companion plants in the center.

Here is the step by step of what we did. You can improvise as needed so the project fits your needs and matches what is available to you.

Materials Needed:

6 ft x 6 in cedar used for privacy fencing –UNTREATED

2 x 4 or other size solid wood – UNTREATED

Wood glue

Galvanized screws

Screw driver/Drill

What We Did:

1) Have the fencing wood cut down on curved edge to create straight line.

2) Figure out how many beds you need, and for any 3×6 beds, have 6 foot planks cut in half to make two 3 foot planks.

3) Have the piece of wood (2×4 or other size) cut to 2 inch wide pieces that’ll fit in each corner of garden bed.

4) Group your materials together for each bed: 1 group would be comprised of 8 screws, 4 corner pieces, 2 six foot pieces, and either 2 more six foot pieces OR 2 three foot pieces.

5) Glue corner pieces onto the planks that will become the sides – but you only need to do this for TWO of the four sides. Let dry until able to work with it. (We waited about an hour or so)

image

This photo shows 4 sides with corners glued, enough for putting together 2 raised beds once paired with the other sides that don’t need to be prepped.


6) Screw together the corners, using 2 screws per side of corner.

image

7) Let dry before moving, handle with care while transferring to its more permanent placement in garden.


That’s it! Our grand total for each garden bed ended up being around $10 because my husband was able to do a lot of the prep work with the wood himself, but if you are not able to, the places you can buy the wood from can cut the wood for you.

We ended up saving A LOT of money with this project, and hopefully you can as well! You can purchase raised bed kits, but they can be pretty pricey! We opted to build them ouselves.

Bonus points: 

The 3 x 6 works great with a full size fitted sheet when an unexpected frost hits!

image

When building raised beds yourself, you have a lot more options and can personalize your raised garden. If you or someone you know has spare wood or materials, you’ll save even more money while being resourceful. Have fun, be safe, and craft your garden with this budget friendly project!

** But remember, NEVER use a tool you are uncomfortable using or cannot safely use!! Safety is priority!


NOTE: I plan to update this post further when we build our next raised bed so that it is more specific and includes step by step photos.


Our First Raised Bed!

Hello reader,

The weather has remained warmer than usual for this time of year. I became timid about waiting to start our cool weather crops because of the warmer temperatures. My husband has been amazing with his hard work. He went out and prepped the ground, clearing out all of the grass and loosening the soil before placing down our first raised bed. I know last time, I said my next post would be out “how to” for building these, but I had to sneak in this post before next weekend!

We plan to get our soil from the recycling center in town, where we can get a bulk amount for a slightly less amount of money. It’s also a great quality for garden use. Unfortunately, the soil isn’t ready to purchase at the recycling center yet. But there was an alternative way to get soil for a cheap price! On our trips to Lowe’s, we kept checking for their opened/damaged bags in the lawn and garden area. Our firs time checking, we were able to get soil and black mulch for 25 cents a bag! The most recent time we found opened/damaged bags for sale, we got peat humus, cow compost, top soil, and more mulch for 1/2 price. When it was time to fill our 3×6 raised bed, we mixed together the top soil, compost, and peat humus with a goal of having a 2:1:1 ratio (with it being 2 parts top soil). I don’t know if this is right, but it’s what we’re trying out. Sometimes, you just have to do the trial and error method, and that’s okay! I did try to research what we should use, but there were a lot of different ideas out there, so we’ll see if this way works for us.

image

One of our chives, ready to be planted in the middle of our first 3×6 raised bed.

image

In this raised bed, we’ve planted spinach, lettuce, carrots, and the chives. I’ll be planting the second container of chives later on.

I started out with one container of chives, but they got knocked over. So, we hurried and replanted the tiny chive seedlings. I don’t know if you’ve ever had to dig through spilled dirt for tiny grass looking seedlings, but it isn’t easy! We re-planted and then they got knocked into the sink! We re-planted once again, but they didn’t fit back into just one container very well. We ended up needing to put some of them in a second container, sprinkling a few more seeds to help fill it all in. Believe it or not, the twice re-planted chive seedlings survived and thrived despite their rough start! Now that’s what I call a hardy plant! And now, they are getting to be big enough to transplant into their more permanent home.

image

Spinach seeds being planted after soaking in a wet paper towel overnight.

image

Ta-Da! Everything is planted and watered. Now to wait for sprouts.

I didn’t expect to be so excited for the purple carrots, but I’m especially anxious to see if the carrots will work out this year. I tried carrots before without luck, but it was later in the season  the dirt wasn’t very worked through. Hopefully a raised bed makes a positive difference! They were free seeds with my purchase, so why not see what happens? And the lettuce and spinach will be extremely welcome! We love making salads with homemade vinaigrette, and the spinach should be able to freeze well for later use! Whatever it is you are excited to grow for your cool weather crops, I hope you have fun crafting your garden!

Oh! One more piece of excitement… We have an update on our pepper seeds. Just FOUR days after using the paper towel method combined with heat source, we have a Jalapeño seed that has germinated! I have to admit, I’ve never had great luck with growing peppers from seeds. Then again, I’ve never had a heat source for them – oops! Seriously though, this is just awesome!

image

Our first pepper seed – germinated in FOUR days!

Until next time fellow gardeners!

UPDATE 2/21/17:

Today I came home from work prepared to plant 1 Jalapeño Mild Pepper seed, and maybe a few Forget-Me-Nots… To my pleasant surprise, many more seeds had germinated! I decided I needed to update since last night.

image

As of now, we have 2 Banana Peppers, 5 Ozark Giant Peppers, 4 Cayenne Peppers, 6 Jalapeño Mild Peppers, and a LOT of Forget-Me-Nots. They are now planted in some potting mix for now (for moisture purposes). I forgot to mix it with seed starter mix… But, hopefully within this next week we’ll start seeing some sprouting! I’d say using the heating pad we already had on hand worked beautifully! I’ve not had success germinating peppers very well in the past, but between the continuous moisture from paper towels and heat, we have take off my garden friends!